Handmade Soap Recipe
Today I am going to be demonstrating another fun handmade soap recipe. This recipe uses a 6 carrier oil formula that produces a moisturizing bar with robust lather. It is scented using a wonderful and unique blend of 5 different essential oils including Soap Making Resource' lavender (premium) essential oil, litsea cubeba essential oil, bergamot essential oil, spearmint essential oil and amyris essential oil. Finally, it is designed with an attractive natural blue woad powder swirl. Enjoy this tutorial everyone!
Below is a picture of the finished product. Isn't it beautiful...
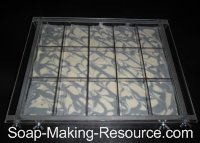
Today's handmade soap recipe will make 5 pounds of soap and we will be using our Soap Making Resource 5 pound acrylic slab soap mold to create the batch. Soap Making Resource's slab soap molds work perfectly for our specific swirl technique that we will be using to design this product.
Below is the exact handmade soap recipe formula that we will be using to make this batch.
- Olive Oil (Grade A) = 26.5 Ounces (50% of total oils)
- Coconut Oil (76 Degrees) = 10.6 Ounces (20% of total oils)
- Palm Oil (RBD) = 5.3 Ounces (10% of total oils)
- Avocado Oil = 4.24 Ounces (8% of total oils)
- Castor Oil = 3.71 Ounces (7% of total oils)
- Shea Butter = 2.65 Ounces (5% of total oils)
- Lavender (Premium) Essential Oil = 25 grams (.881849 Ounces)
- Litsea (Cubeba) Essential Oil = 20 grams (.705479 Ounces)
- Bergamot Essential Oil = 14 grams (.493835 Ounces)
- Spearmint Essential Oil = 10 grams (.35274 Ounces)
- Amyris Essential Oil = 6 grams (.211644 Ounces)
- Woad (Powder) = 1 teaspoon
- Distilled Water = 20 Ounces
- lye (Sodium Hydroxide) = 7.2664 ounces (206 grams)
* This recipe has a 5% super-fat.
* All measurements are weight measurements, not liquid measurements.
Below are the step by step instructions for making this handmade soap recipe successfully.
Step 1) First, we need to create the lye solution needed for this batch. Carefully measure out 206 grams of dry lye (sodium hydroxide) into a heat and chemical safe container.
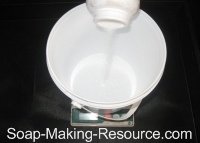
I always like to weigh out my lye portion in grams because using this small unit of measurement is a lot more accurate than measuring in ounces.
Next, weigh out your needed distilled water portion. To create the lye solution needed for this handmade soap recipe batch, we are going to need 20 ounces of distilled water. Weigh out this portion in a heat and chemical safe container.
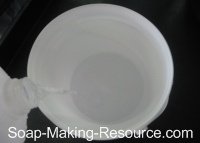
Remember, when measuring out your water portion, we are using weight ounces, not liquid ounces. Also, always be sure to use distilled water, not faucet or bottled water when making soap.
Now that both the distilled water and lye portions are accurately measured out, we are going to combine the two components. Carefully pour your dry lye into the distilled water while continuously stirring with a heat and chemical safe mixing utensil.
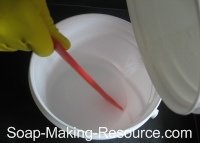
When you combine the lye and distilled water, you will notice that a strong fume will be present. Be sure to avoid breathing in these vapors! You will also notice that the reaction will cause your lye solution to rapidly heat up. When creating your lye solution, it is best to do so in a well-ventilated area and away from children and pets.
Now that your lye solution is successfully created, place a thermometer into the mixture and set it safely off to the side for future use. We want this solution to cool to around 100 degrees Fahrenheit for use in this handmade soap recipe batch.
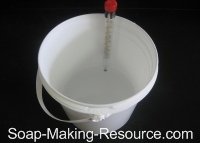
Step 2) While our lye solution cools, we are going to measure out and melt down the soap making oils needed for this batch according to our handmade soap recipe formula. Measure out each oil that is needed for this batch into your stainless steel soap pot as demonstrated below.
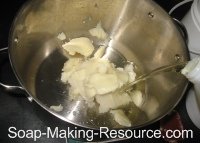
I usually like to measure out the hard oils within my recipe first, followed by the liquid oils. I do this so that if I accidentally over measure one of the hard oils, I can easily remove it from the pot without it coming into contact with the other oils.
Now melt down your soap making oils by placing your stainless steel pot on a cook top burner and applying a low heat.
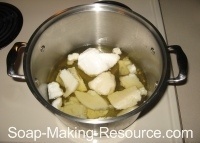
Be sure to keep the heat as low as possible so that you don't scorch the oils!
Step 3) While our soap making oils melt, and the lye solution continues to cool, we are going to prepare the natural additives needed for this batch. First, let's measure out the portion of woad (powder) that we will need for this recipe to create our swirl.
In a separate container, measure out 1 teaspoon of Soap Making Resource's all natural woad powder.
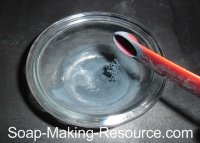
Now place this ingredient off to the side for future use.
Next, we are going to prepare our essential oil blend. Today's blend will consist of 25 grams lavender (Premium) essential oil, 20 grams litsea cubeba essential oil, 14 grams bergamot (BF) essential oils, 10 grams spearmint essential oil and 6 grams amyris essential oil. This unique blend of essential oils creates a wonderful sweet citrus scent with smooth floral back notes. It's lovely!
Measure out each essential oil into a separate dish.
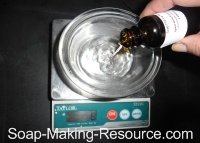
I like to initially measure out each of my essential oils for a blend into a separate dish rather than all into one container. I do this so that if I happen to over measure one of the essential oils, I can always easily remove that specific oil with a pipette. This would be impossible if we were measuring the essential oils into one another.
Also, I always use grams to weigh out my essential oils for a blend as this small unit of measure, once again, is much more accurate than measuring using ounces.
Finally, combine all the essential oils into one dish so that the blend is ready to be quickly added to your batch when the time is right!
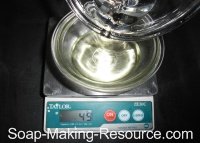
Step 4) While you were measuring out the woad powder and preparing the essential oil blend that we will be using for this handmade soap recipe, your soap making oils have likely melted down completely. If your oils have indeed fully melted, we need to lower the temperature of this oil mixture to around 100 degrees Fahrenheit for this particular handmade soap recipe. You can lower the temperature of your oils by simply placing your soap making pot in a sink filled with ice water. At this point, your lye solution has likely cooled down substantially on its own, but if it needs to be cooled further, you can use the same "ice water bath method" as shown in the picture below.
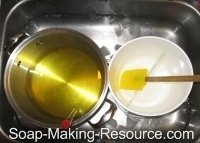
Step 5) At this point, our essential oil blend along with the woad powder have been prepared and are ready to be added to this handmade soap recipe batch when the time is right. Also, our oil mixture and lye solution has been created and cooled to around 100 degrees Fahrenheit. We are now finally ready to make soap!
|
Sign Up Today!
*Your information is SAFE with us! |
First, carefully pour your lye solution into your soap making oils mixture and stir manually with a heat and chemical safe mixing utensil.
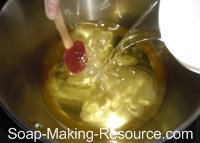
Keep stirring this mixture manually until you achieve an even texture and color.
At this point, mix your soap batch using a stick blender until you reach a very light trace.
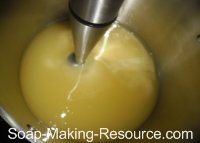
It is vital here that you do not mix your soap for too long as the swirl technique demonstrated within this tutorial requires that you keep the batch as thin as possible in order for it to work successfully. Be sure to test for trace often so that you can stop mixing as soon as trace is reached!
You can test for trace by dribbling a small amount of soap onto the surface of your main soap batch. If the soap sets on top of the batch, even if just for a moment, before sinking back into the rest of the mixture, you have reached trace. Successfully recognizing trace as soon as it is reached is one of the keys to making this batch successfully as our swirl technique won't work if the soap is too thick.
Once you have reached a very thin trace, measure out 1.5 pounds of your soap batch into a separate container, leaving 3.5 pounds of soap in your main stainless steel soap pot. The smaller of these two soap portions will be colored with Soap Making Resource's natural blue woad powder and used to create our swirl.
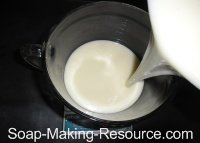
As you can see in the picture above, I like to weigh out the small soap portion that will be used for our swirl into a container that has a good pouring spout. This will make it much easier to pour the colored soap to create the swirls later on in this recipe.
Now that your handmade soap recipe is split into two portions, we are going to color the small 1.5 pound portion a nice natural blue with Soap Making Resource's woad powder. It is actually rather important to create the blue soap portion first as this portion will not thicken up as quickly as the portion to which you are adding the essential oil blend.
Incorporating the woad powder into the 1.5 pound soap portion and then incorporating the essential oil blend into the 3.5 pound soap portion will allow you to immediately pour the large fragrant portion into the mold as soon as the essential oils are thoroughly mixed in and avoid having to wait till the blue portion is prepared.
This processing order is important, once again, to ensure that your soap portions remain as thin as possible so that we can successfully create a swirl using the technique demonstrated later in this tutorial. If you are forced to let your large soap portion with essential oil blend just sit there for several minutes while the smaller blue portion is prepared, this length of time could cause the soap to thicken up too much.
Add ¼ teaspoon to ½ teaspoon of woad powder to the 1.5 pound soap portion depending on how dark you want the shade of blue to appear.
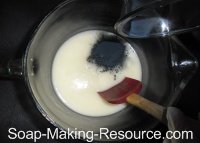
Now stir the powder in manually using your soap mixing utensil until it is thoroughly integrated.
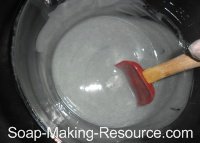
Usually, when adding powdered colorants to soap, I will remove 1 or 2 ounces from the batch and mix the colorant into this tiny soap portion first to ensure that the powder is thoroughly mixed in and no powdered clumps are present. Then, I will add this small 1 or 2 ounce colored soap portion to the rest of the batch for color. With this handmade soap recipe batch, however, I omitted this "tempering" step as woad powder is an extremely fine powder that incorporates into soap well and our soap batch is also very thin, which makes it easier to thoroughly mix in powdered botanicals. Bottom line is, you can probably add the woad powder straight to the small 1.5 pound portion and incorporate it successfully without worrying about the powder clumping.
If need be, you can give this colored soap portion a few "blasts" with your stick blender just to ensure that the powder has been thoroughly mixed in. Just don't mix it too much as we still want the soap to remain relatively thin!
Next, we are going to add the essential oil blend that we prepared earlier to our soap. Only add the essential oils to the 3.5 pound soap portion that is contained within the main soap pot.
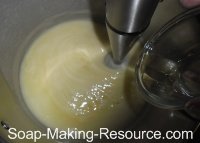
Now stir this soap portion manually until you reach an even texture and color.
If you want, you can give this portion of soap a few "blasts" with your stick blender to ensure that the essential oils have been fully integrated.
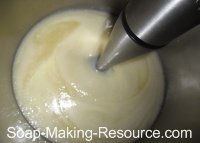
Why are we only adding the essential oils to the 3.5 pound soap portion and not to the entire batch? For one, some essential oils have a tendency to cause soap to thicken up more quickly than usual. Although we want both soap portions to be as thin as possible for use with our specific swirling technique, it is especially important for the portion of soap that is colored with woad powder to be very thin. Omitting the essential oils from the colored soap portion helps accomplish this task.
Furthermore, some essential oils can affect the color of your soap, and we certainly don't want to alter the beautiful blue shade that is produced with the woad powder.
Step 6) At this point, both soap portions are prepared to pour into the mold and we are ready to start creating our swirl design. First, pour the 3.5 pound uncolored soap portion into your soap mold. As you can see below, we are using a Soap Making Resource 5 pound acrylic slab soap mold.
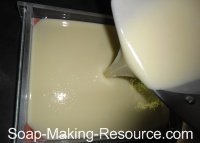
Don't forget to make sure that the soap is evenly distributed throughout the bottom of the mold!
Next, in a zigzag pattern, from one corner of your mold to the other, begin pouring the woad colored soap portion directly into the white soap portion.
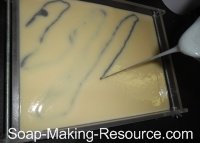
Keep repeat this step, pouring in a similar pattern, but start at opposite corners of the mold until the entire blue soap portion is swirled into the batch.
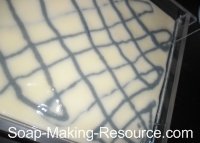
It is important to pour this blue soap from several feet above the mold so that the colored soap portion penetrates through the white soap portion. This will allow the swirl design to be apparent throughout most of your product.
As you can now see, keeping both soap portions thin like we did throughout this handmade soap recipe is vital in allowing the two portions to penetrate through one another and offer clear and defined swirls with real contrast.
Now that the entire blue soap portion is poured into the white soap portion, you need to swirl the two colors together. Simply start from one corner of the mold, and in a zigzag pattern, drag the layers of soap together towards the opposite corner of the mold. You can use skewers, chopsticks, or a thin pipette as shown in the picture below to create your swirls.
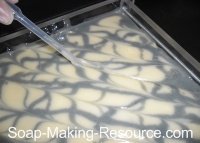
Step 7) Now that you are finished pouring the soap and designing your swirls, place the Soap Making Resource slab mold divider into the mold to form your soap bars.
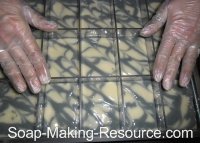
Step 8) Finally, place the lid on your mold and allow the soap to set for approximately 24 hours. This will give your batch plenty of time to solidify.
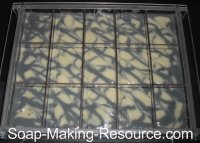
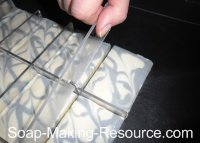
Take your bars out of the mold once they have adequately hardened to the point that they can be removed without damage.
As you can see in the picture below, it is very easy to remove your soap from a Soap Making Resource no-line acrylic slab soap mold.
Step 9) Now set the finished bars on a rack to cure.
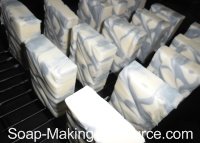
Ideally, allow this soap to cure for about 4 - 6 weeks. This extended cure time will allow the excess water to evaporate from the bar causing your finished product to be hard, long lasting and have a robust lather.
I hope that you all enjoyed this all natural handmade soap recipe tutorial. It was a blast creating it for you! As always, our ultimate goal when creating these demonstrations is to teach you something new about bath and beauty manufacturing and hopefully spark your creativity. I hope that we accomplished that today!
Remember, all of the ingredients show within this tutorial are available to purchase right here at soap-making-resource.com. As always, if you have any questions, feel free to contact us by calling our offices at 717-397-4104. We are happy to help!
Please enjoy browsing soap-making-resource.com, your home for quality soap making supplies, equipment, and tutorials.
Return from handmade soap recipe to the soap recipes hub page.

